Personal Project #2: Multiple Images
This term my class has been set the theme "Multiple Images". We have been told to let our creative juices flow using only that theme and research about it as inspiration for an entire project.
Inspiring Images
|
|
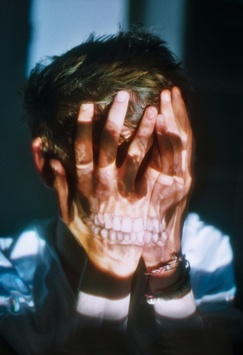
This image is one of my favourites, not for its creative thought, or contrasts of light, or the blend of colours that hint its theme is a summer morning, but the ingenuity of the idea itself. I am intrigued by the use of burst photography, and I am excited to see my final piece and if it involves any examples of burst photography.
My Attempts
These are my attempts at making my own series of Multiple Image photography, and I have experimented with different styles of Multiple Image.
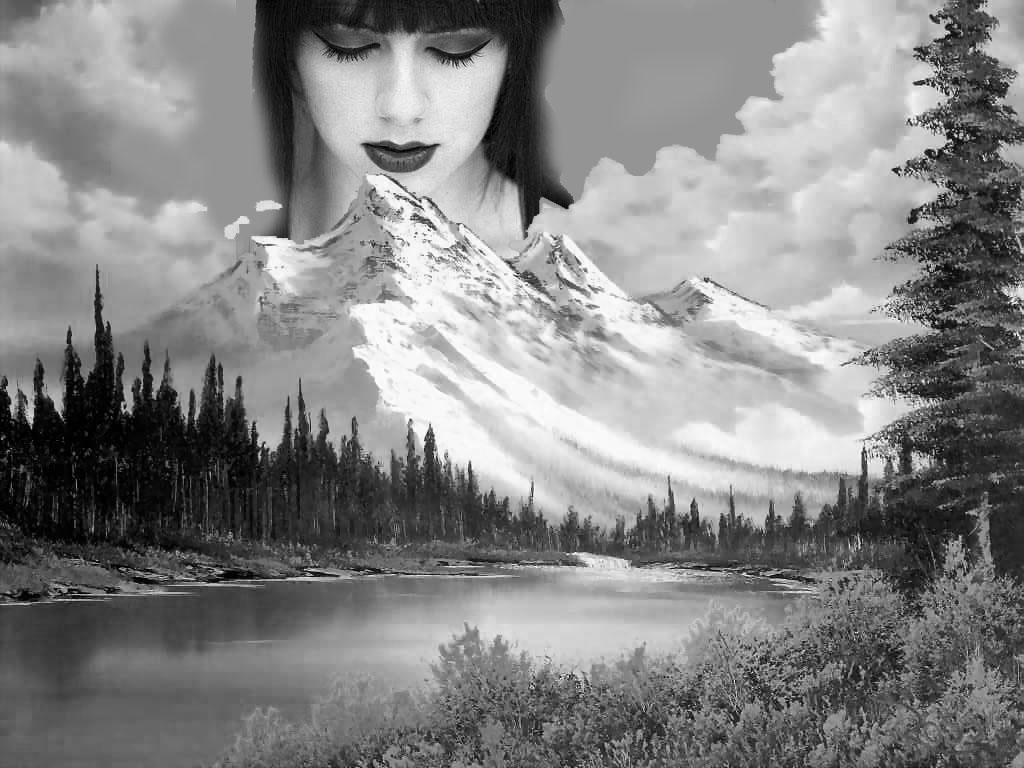
Photoshop Layer Merging

This is my first attempt, and I honestly don't know why I chose this particular character, a thought just popped into my head, and I went with it. I believe I did quite well with the editing of this piece(not the theme, though) and that the transitions between the face and the clouds are soft, like they should be, and the edges of the mountains are straight and precise to the mountain's rock face. I didn't manage to figure out how to add a reflection to the water without ruining the image, so I left the thought to my imagination. I think the addition of a reflection would add to the authenticity of the photo.
This was my second attempt, where I experimented with more serious styles. The serenity of the mountain, alongside the backdrop of the calm look adorned by the girl is relaxing and peaceful. This could have been better edited, as the transitions between the girl and the clouds in front of her are edgy and solid. I should have used the "soften" tool to smoothen the edges of the clouds; and make the outlines look more like a cloud's soft and fluffy outline. I did manage to use the "soften" tool, but in the wrong place. without noticing in the final overlook, and only just now realising that I used the "soften" tool to smooth the edge of the hair(Where it shouldn't be soft, but straight). Long story short, I didn't do as well as I should have with my textures.
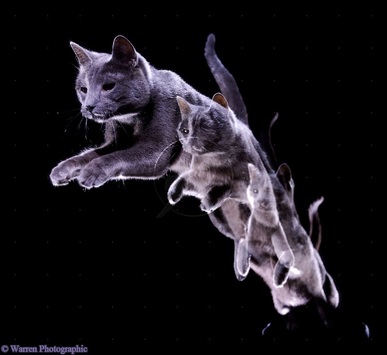
Research: Image bursts
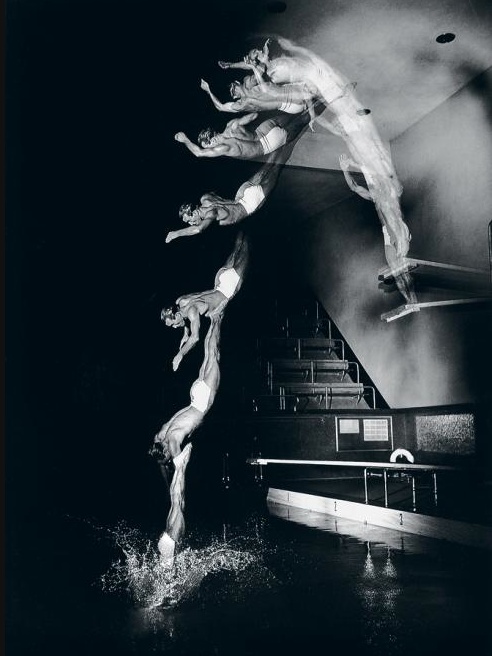
Harold Edgerton
|
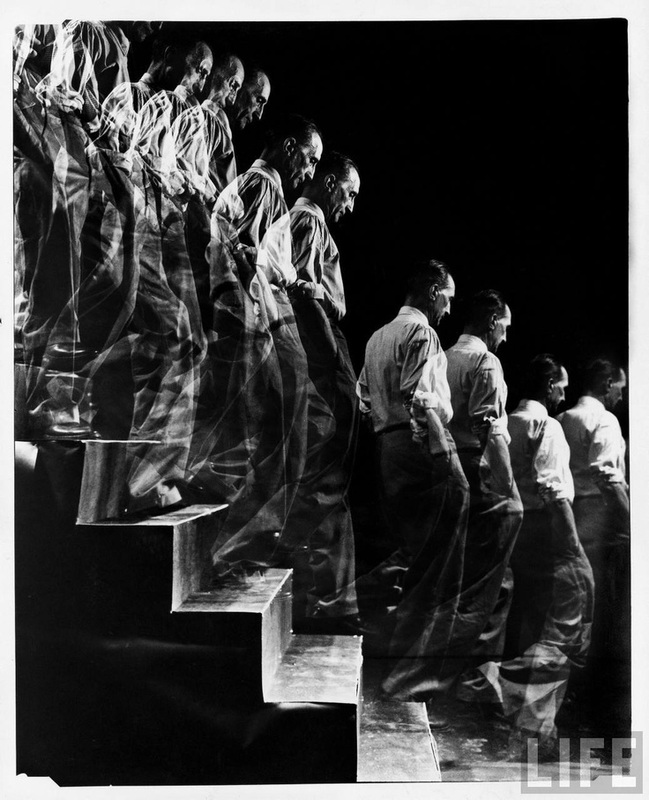
Gjon Mili
|
|
I am interested in creating a mutliple image of a figure moving through a space. The examples above have been created by using a strobe like flash unit in a dark space. As the figure either dives or walks down the stairs the flickering strobe light captures their movement in one image because the photographer has left the shutter open.
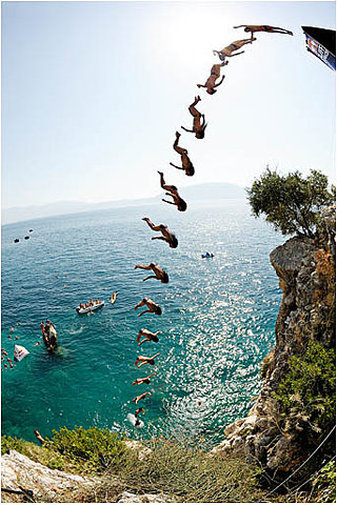
The image on the left (by an unknown photographer) is slightly different. Here the photographer has taken lots of separate photos using the Burst mode on their camera. These pictures have then been stitched together in an image editing programme like Photoshop and blended together. I don't have access to a strobe unit so I am going to attempt an image like this one using one of my friends as the model. |
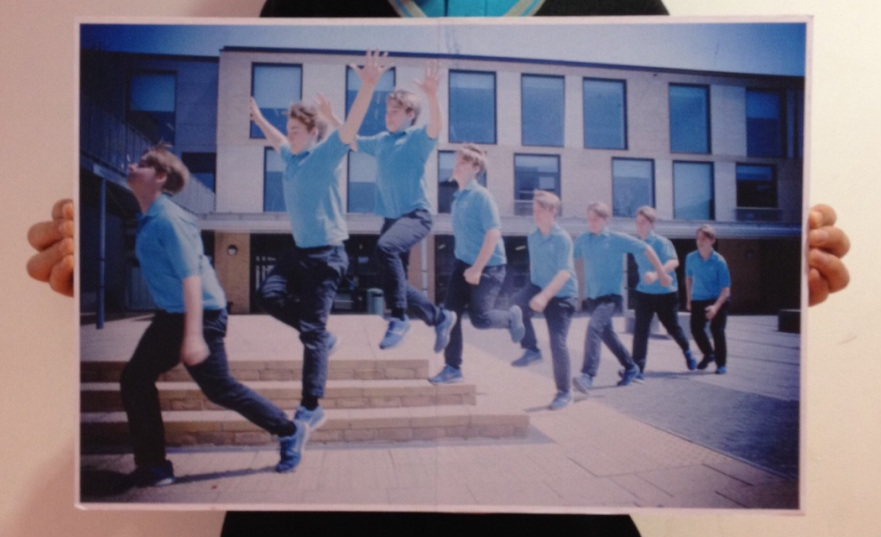
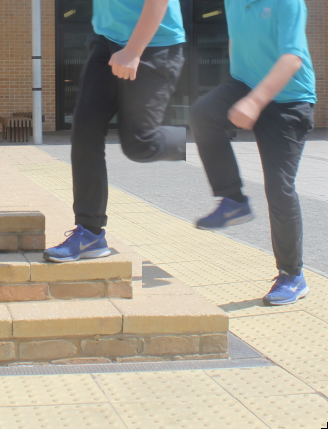
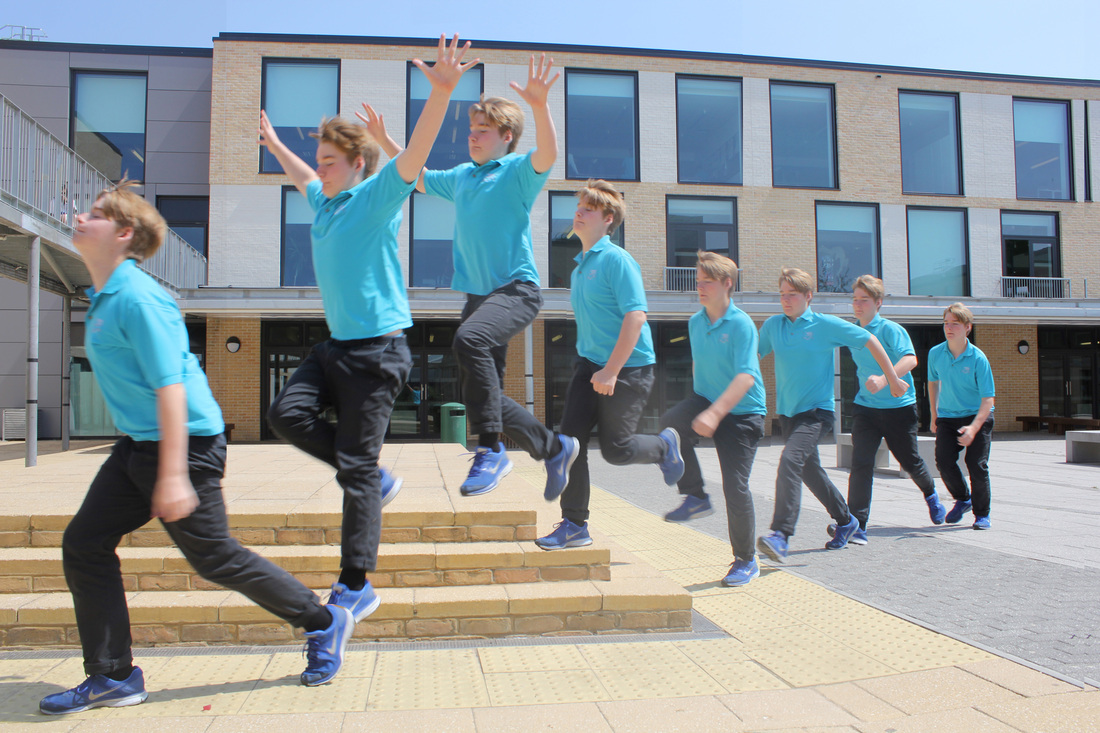
The Final Piece


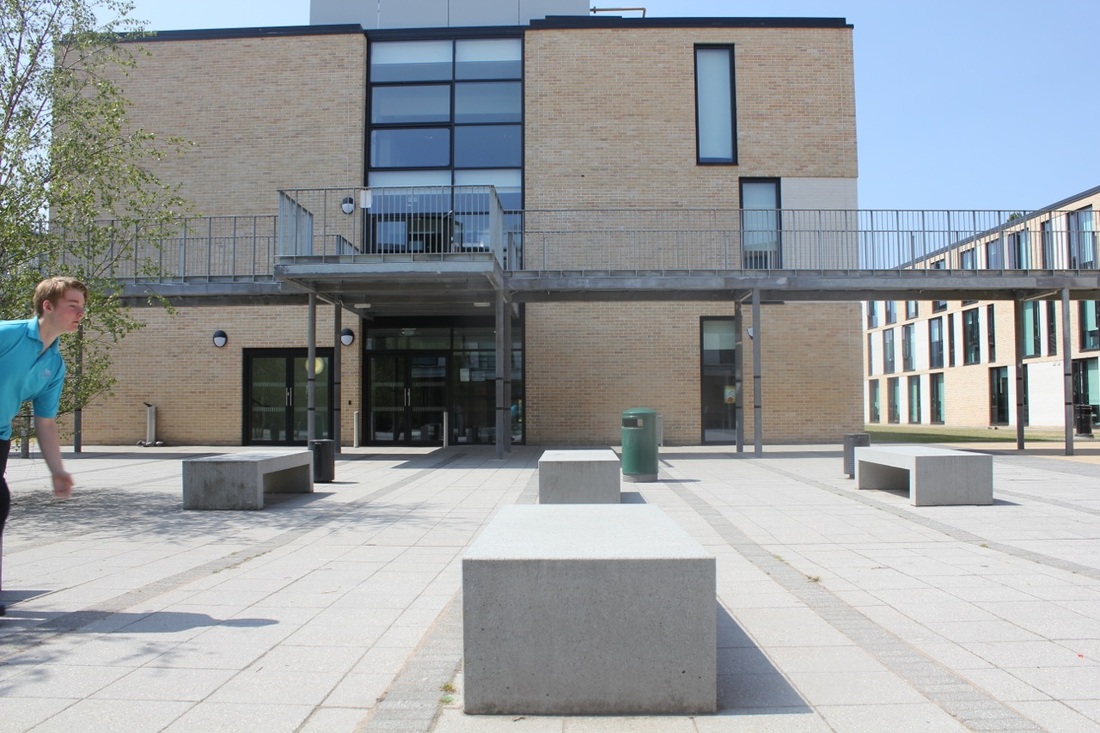
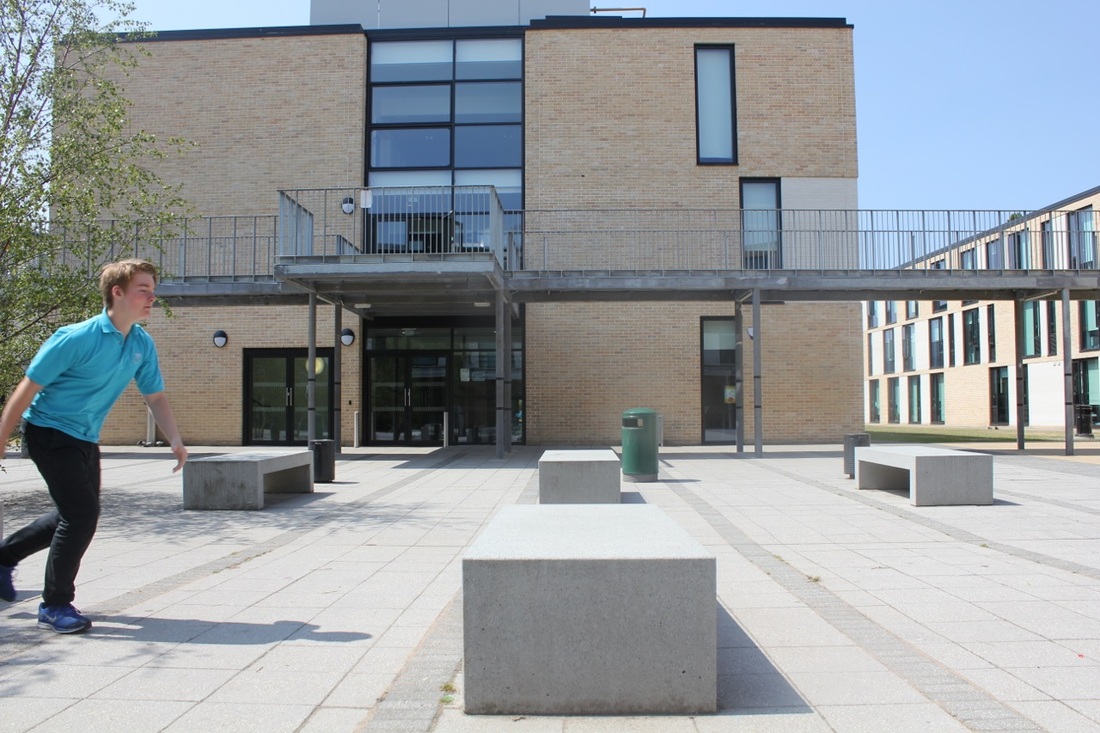
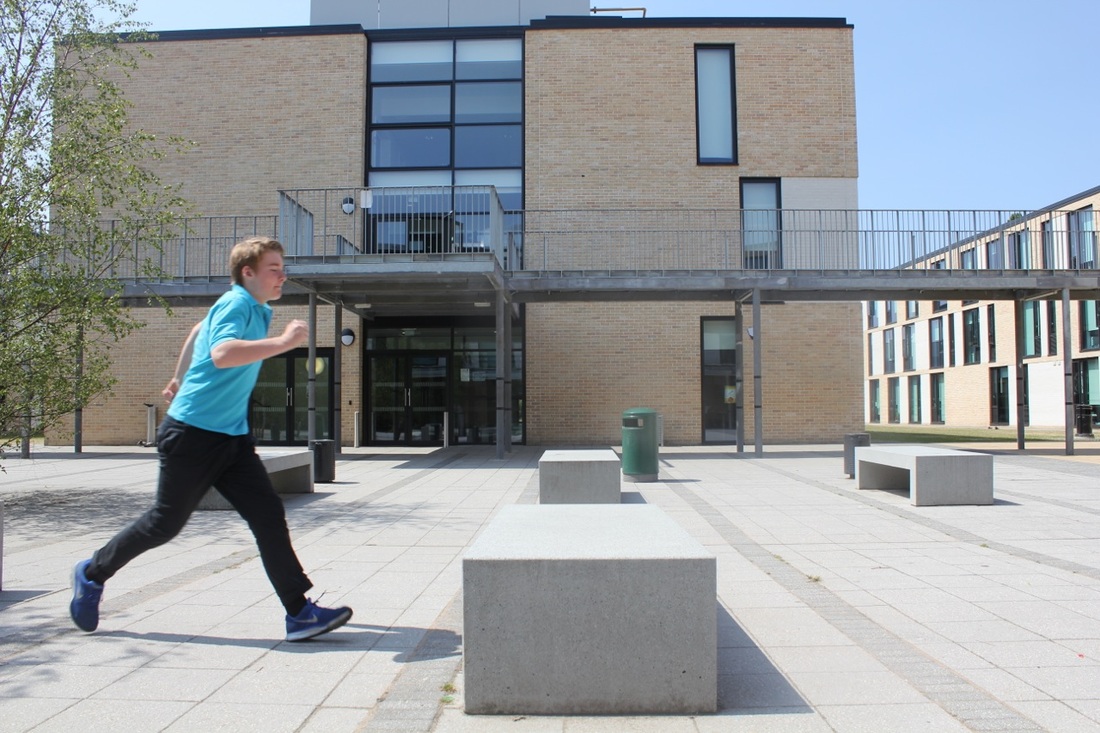
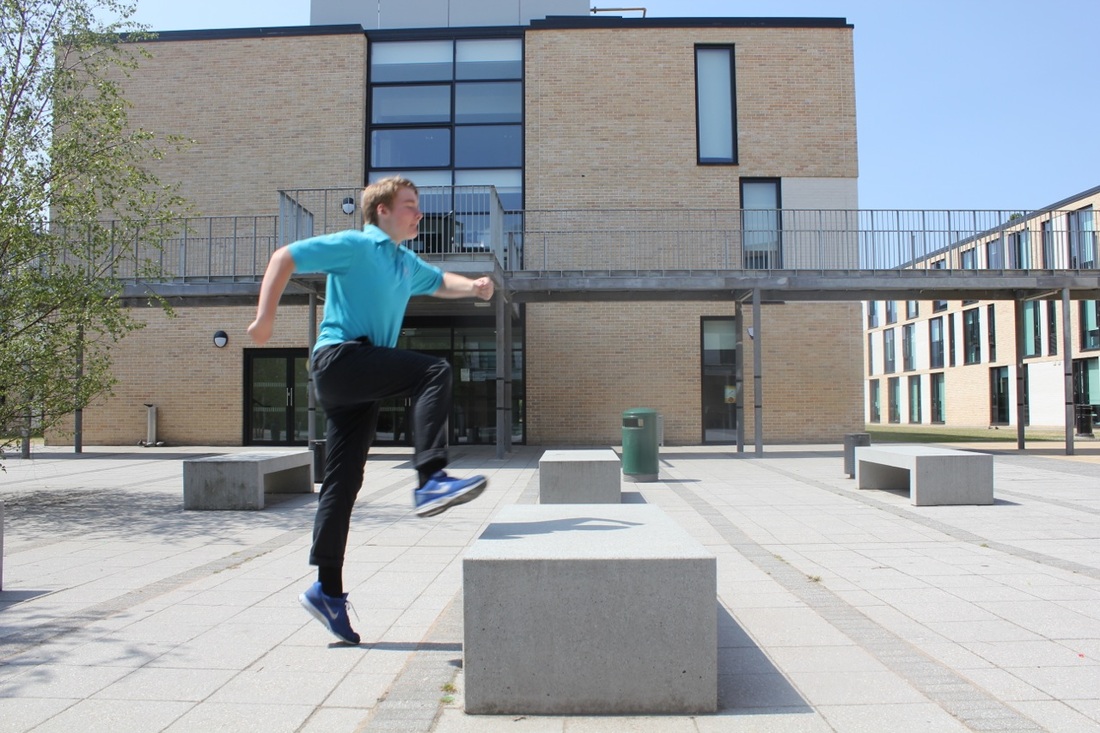
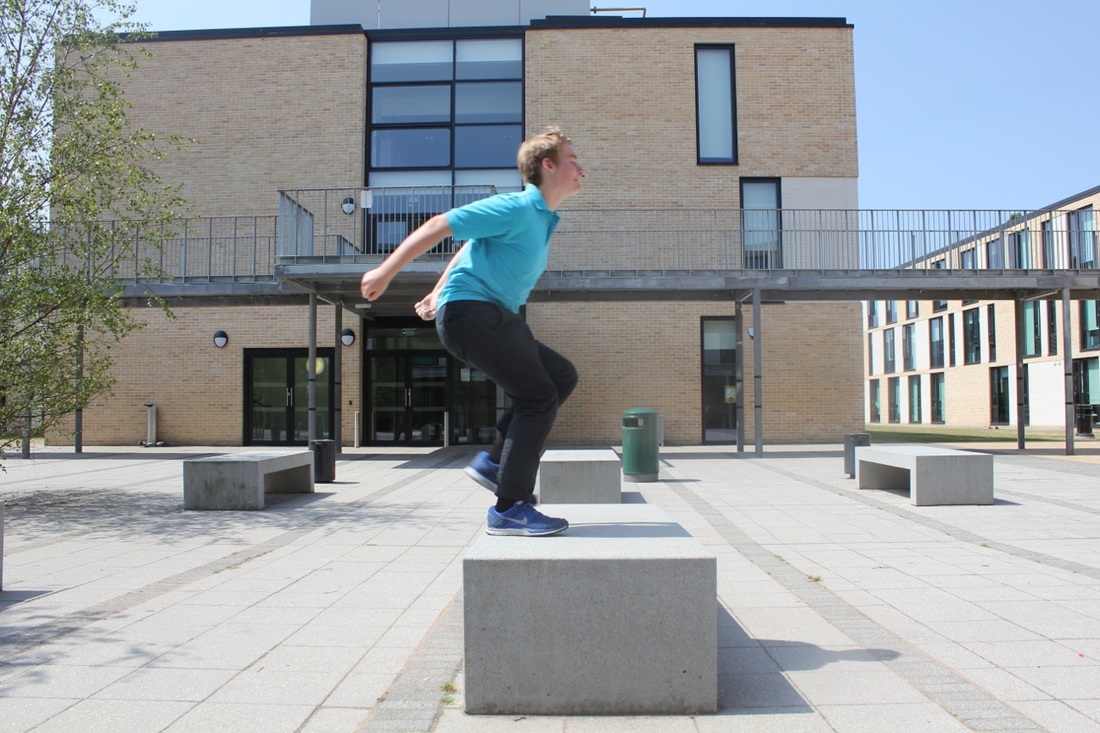
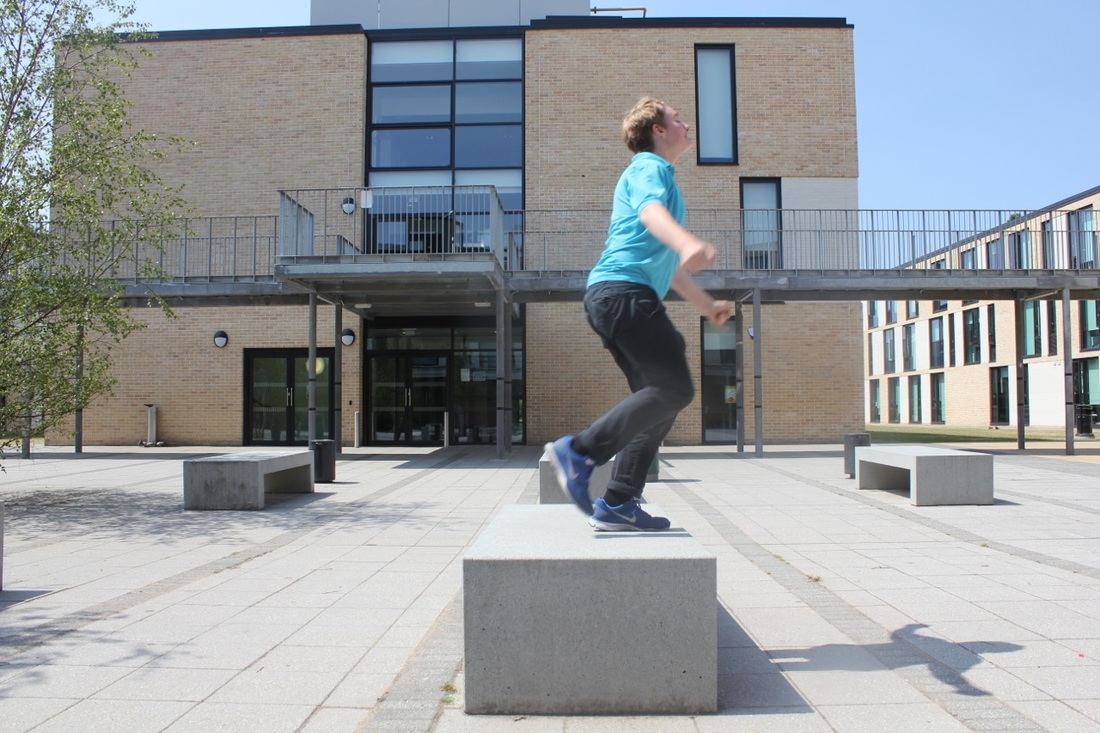
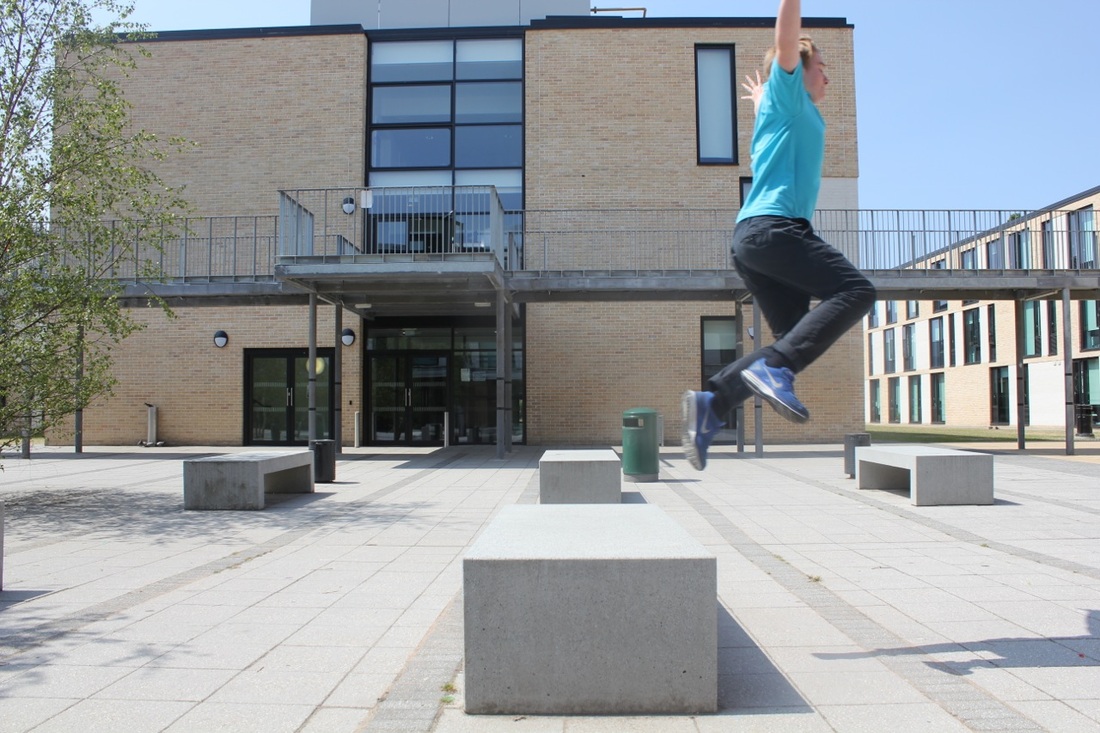
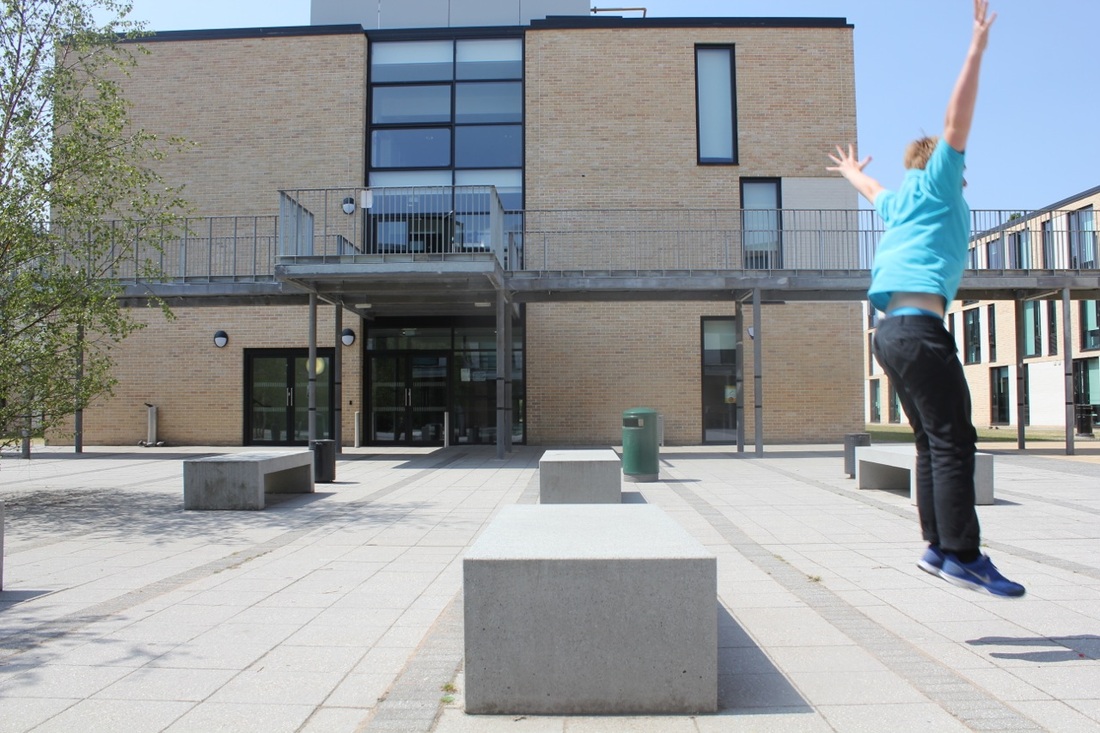

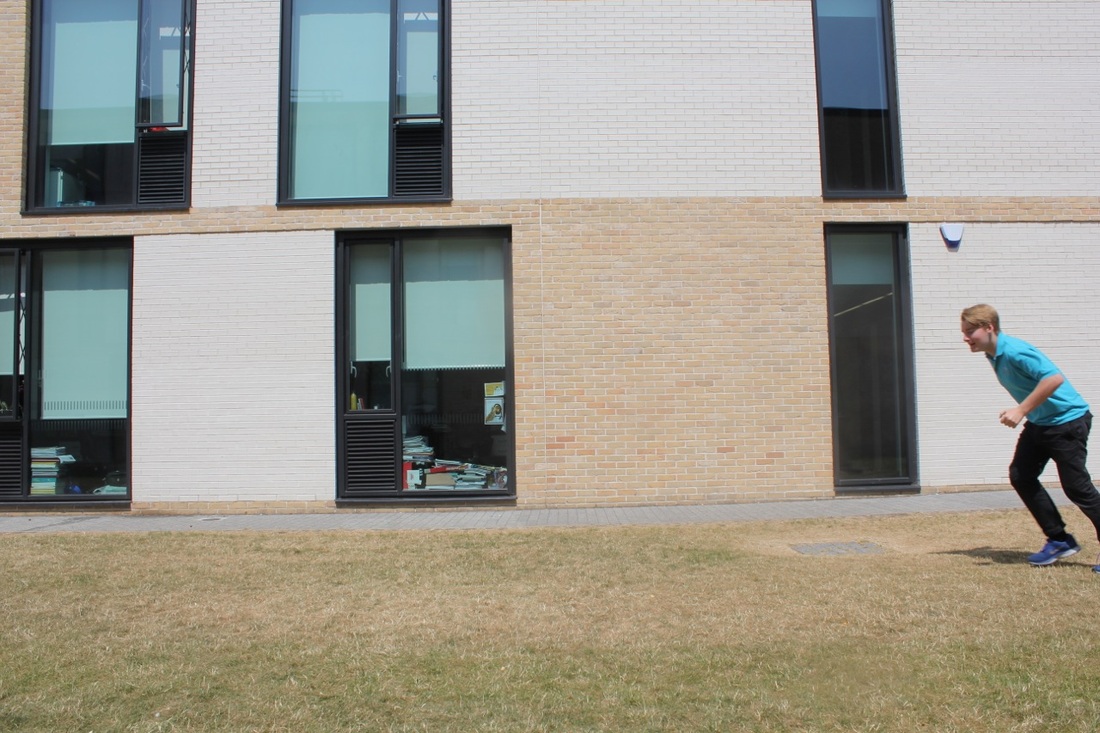
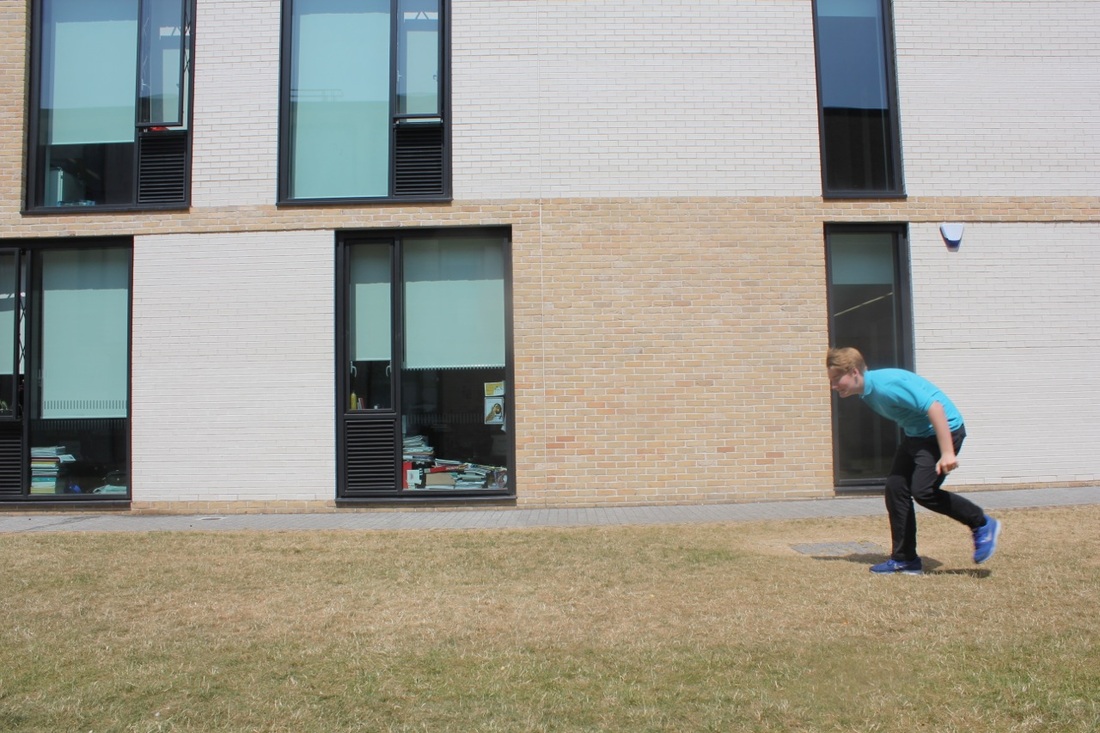
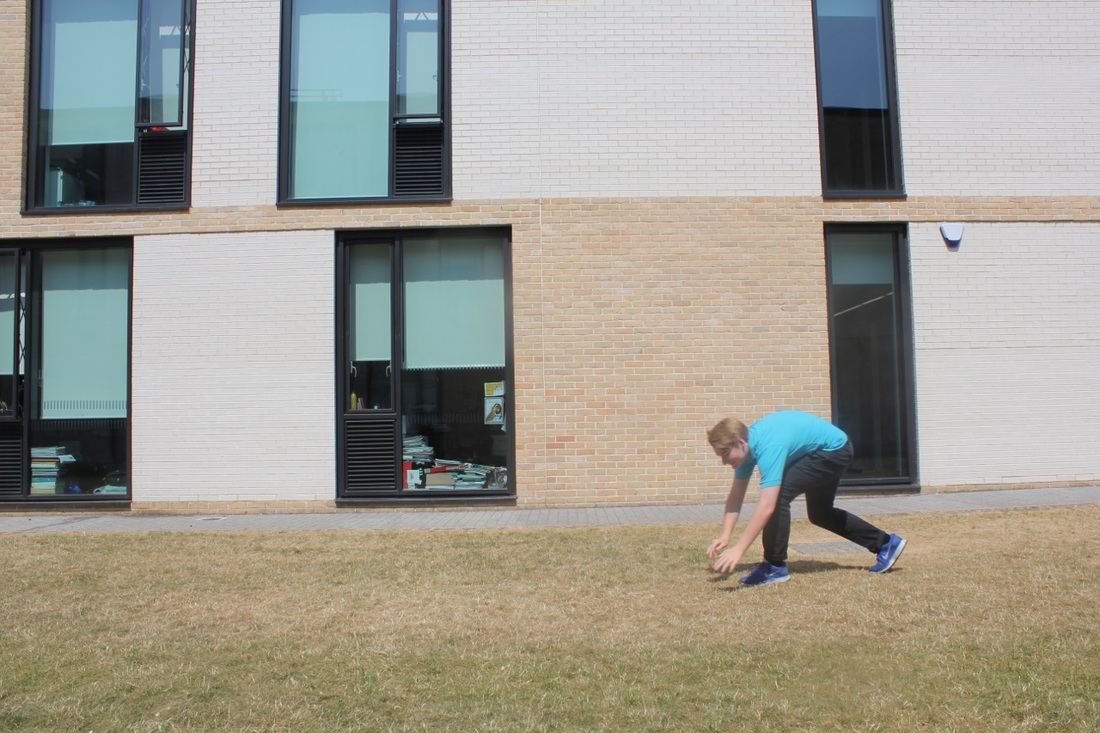
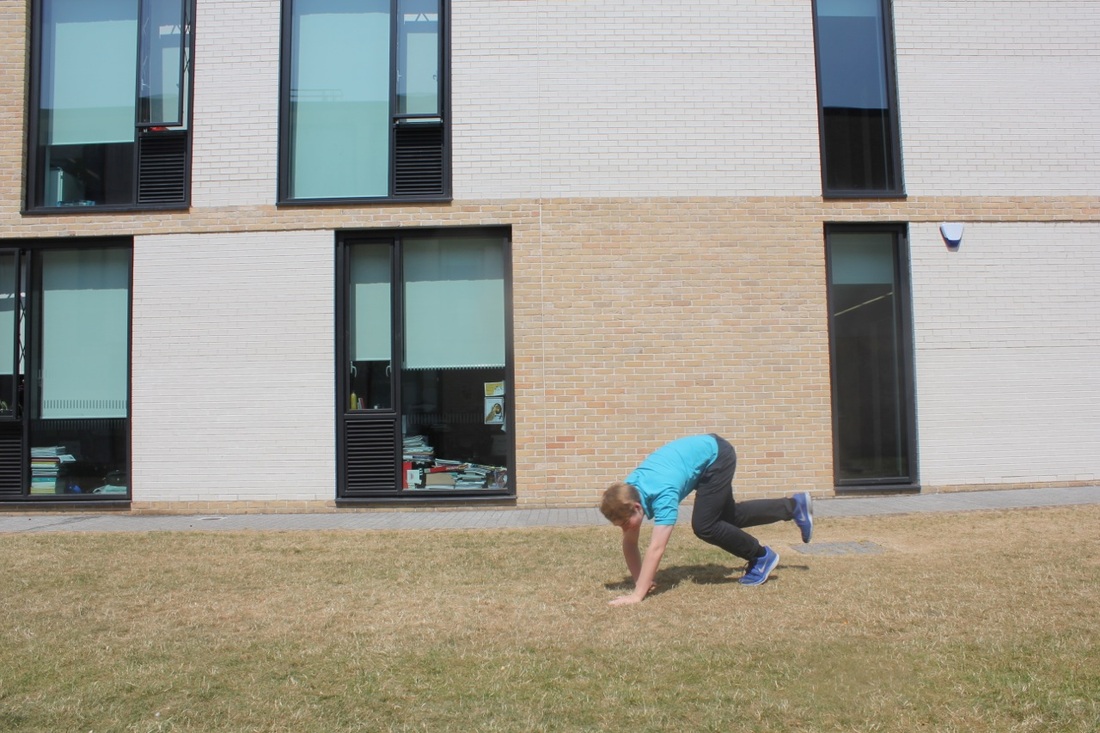
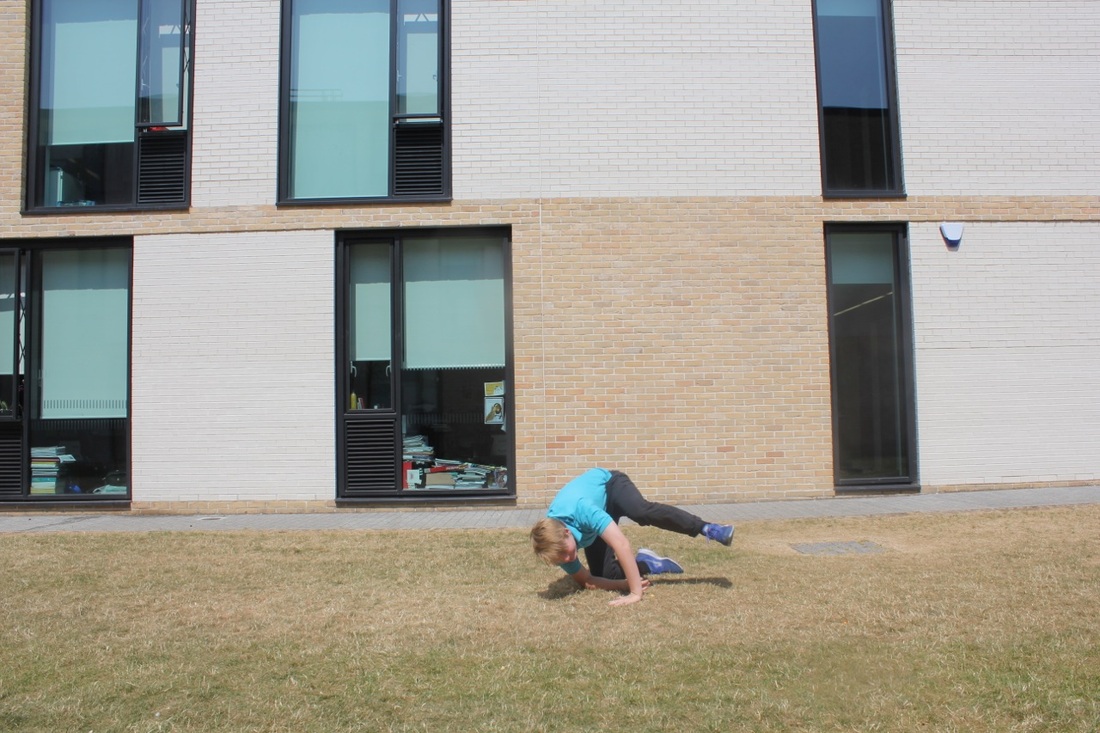
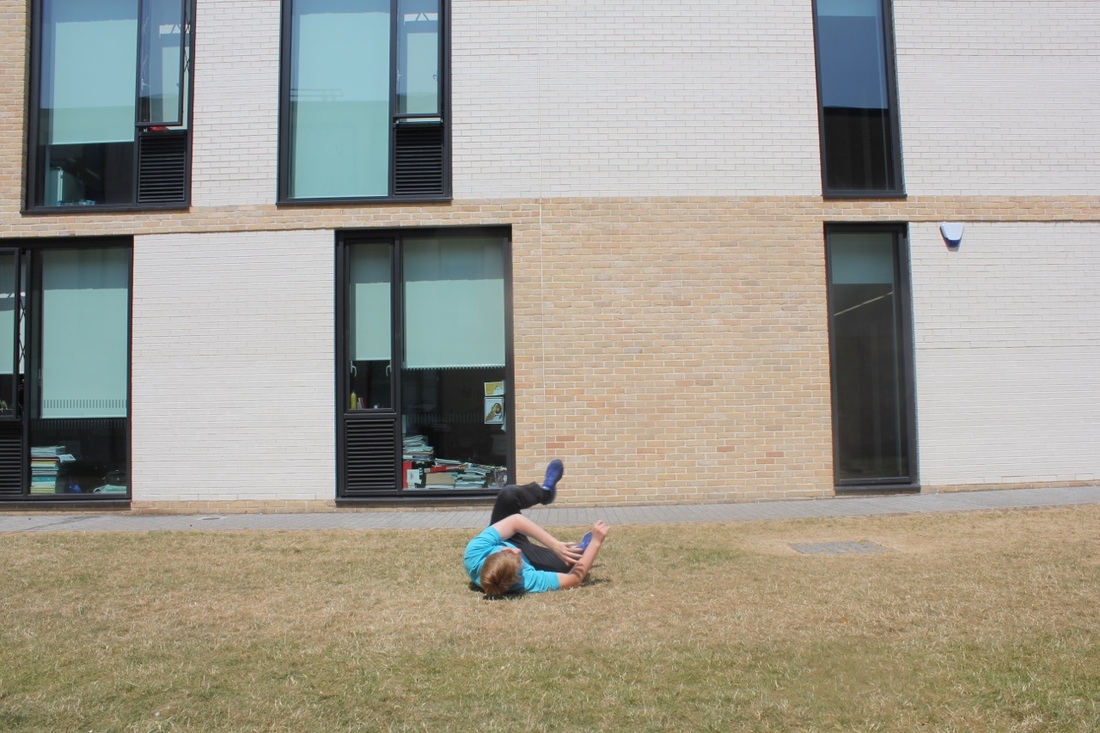
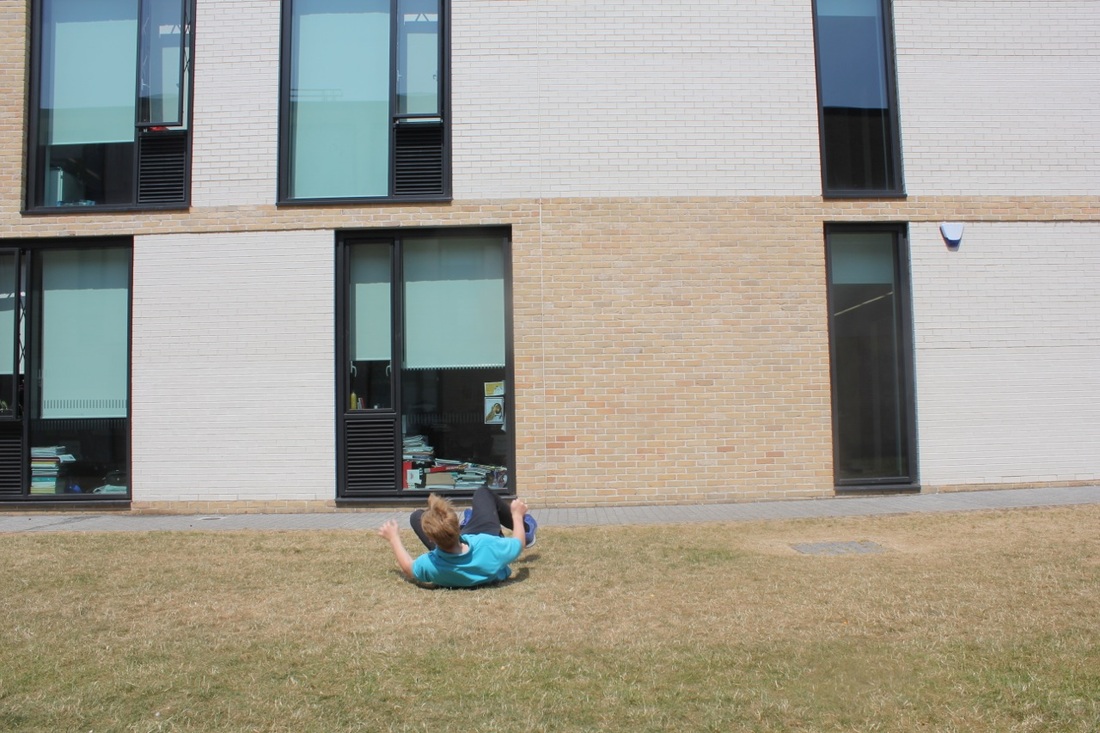
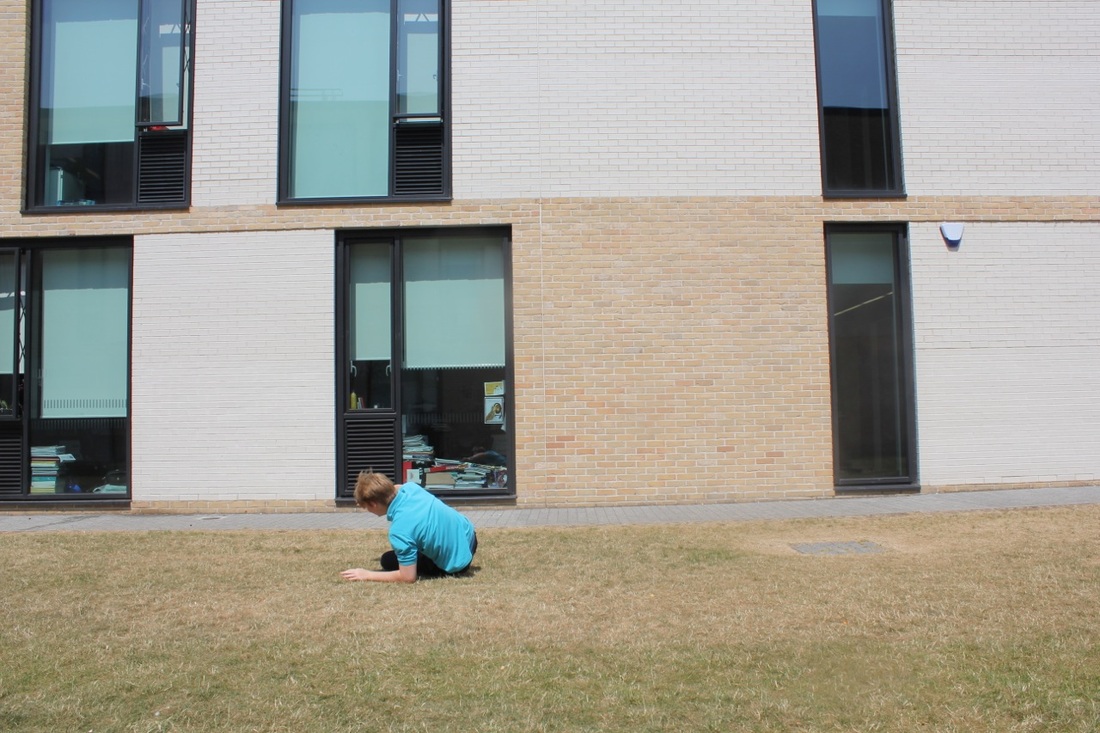
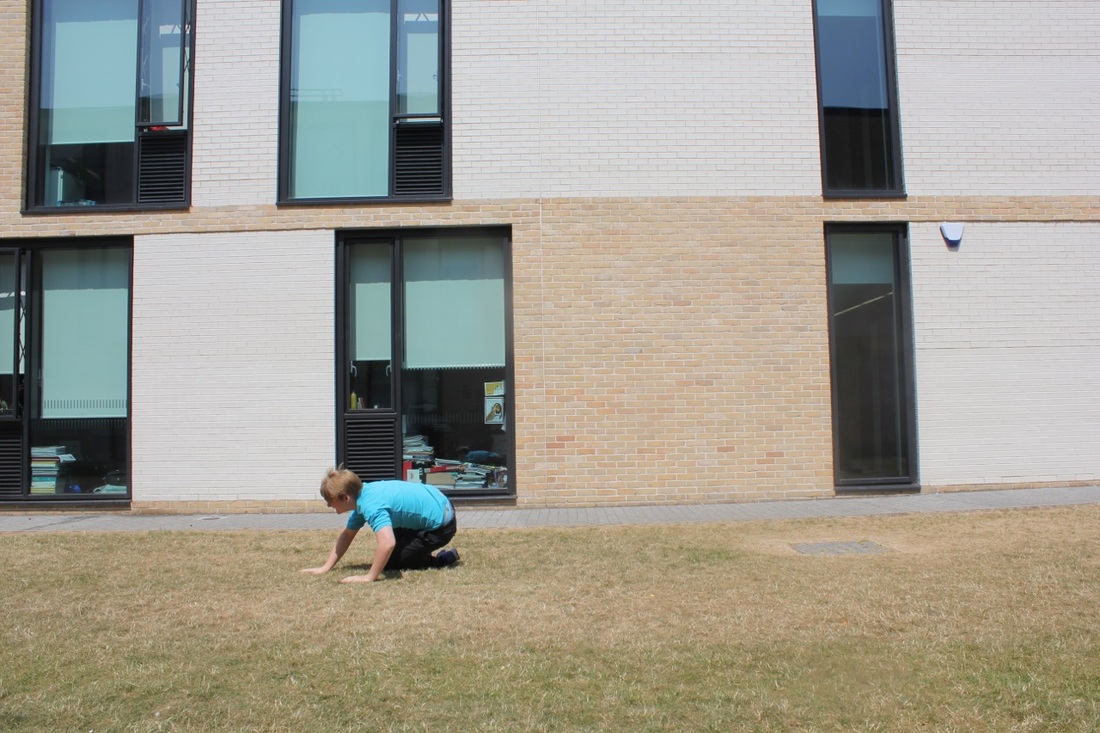
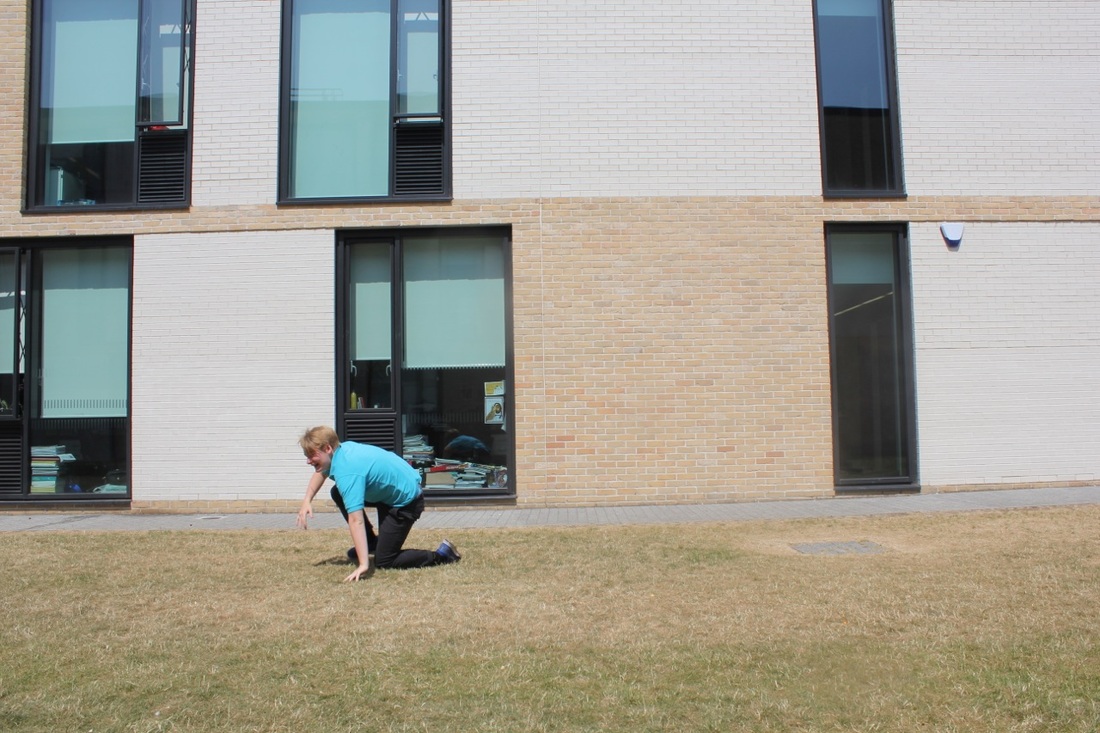
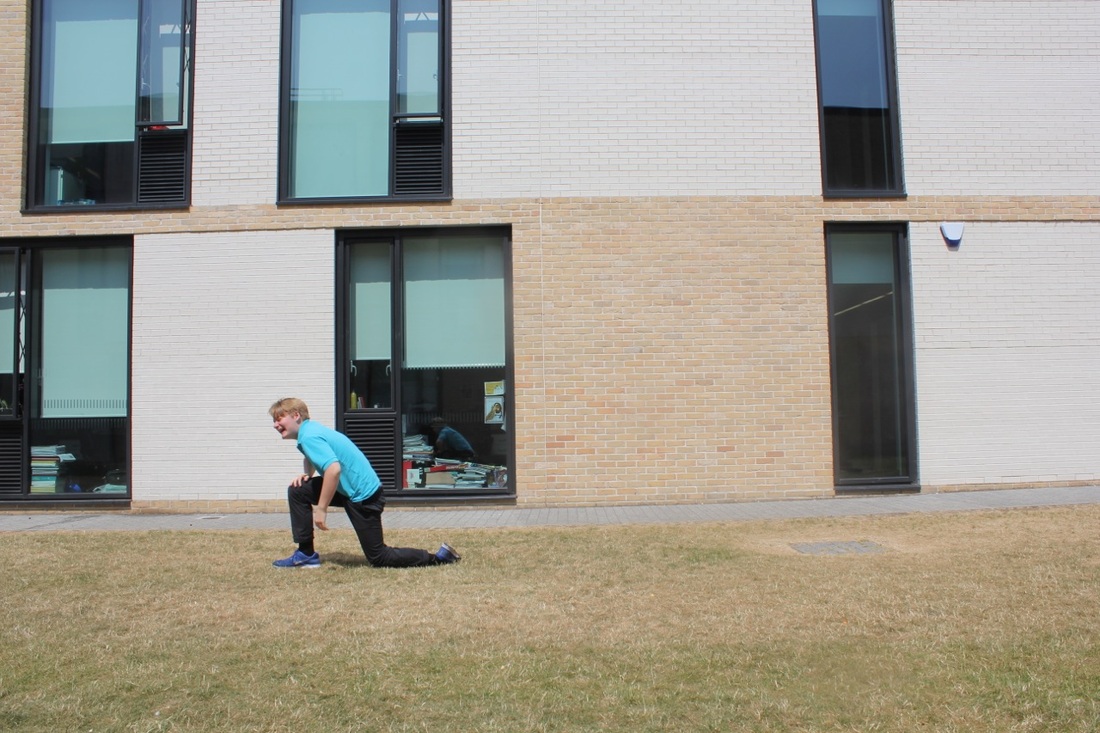
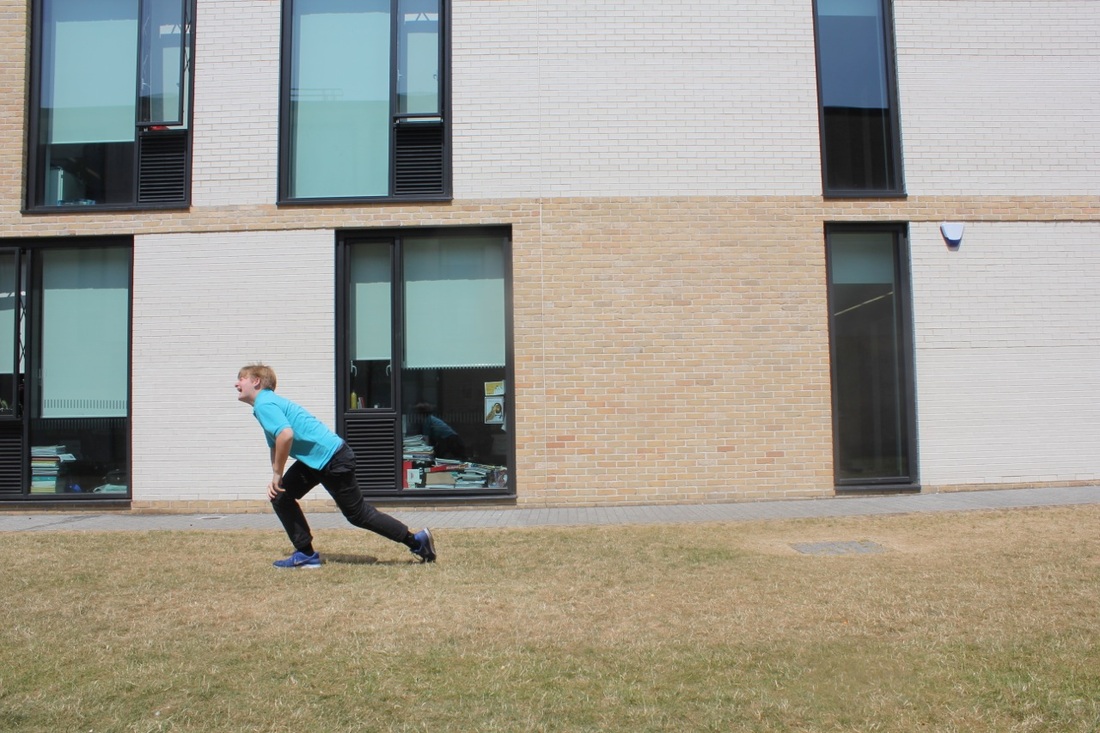
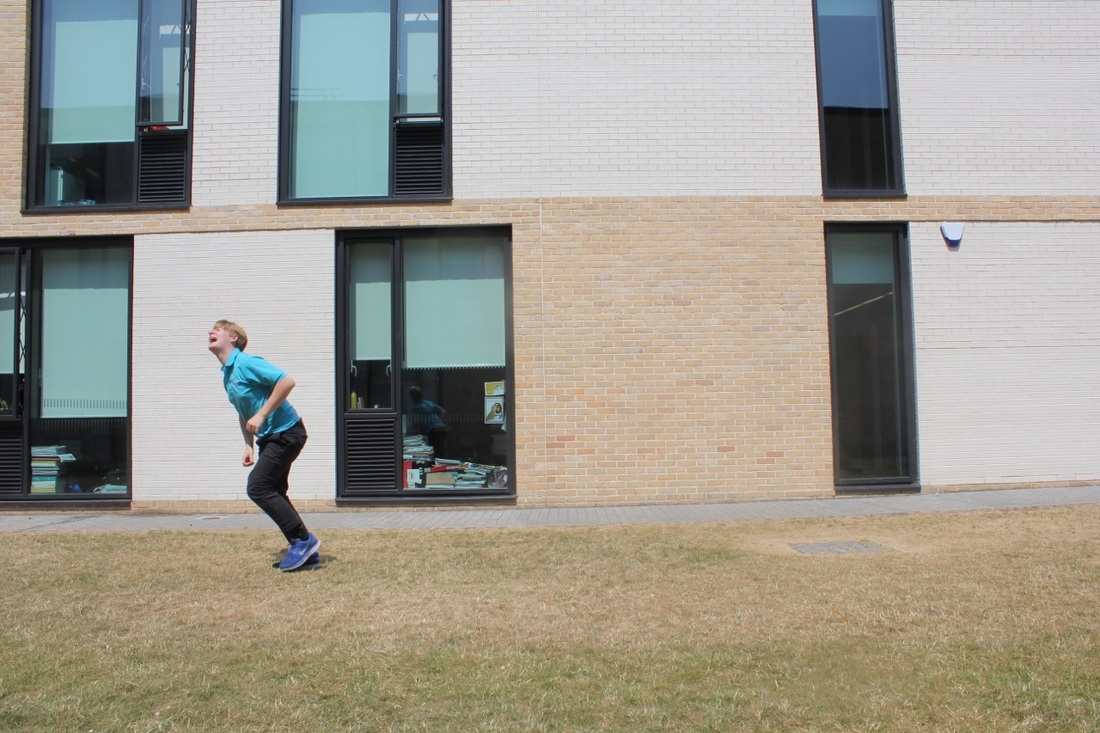
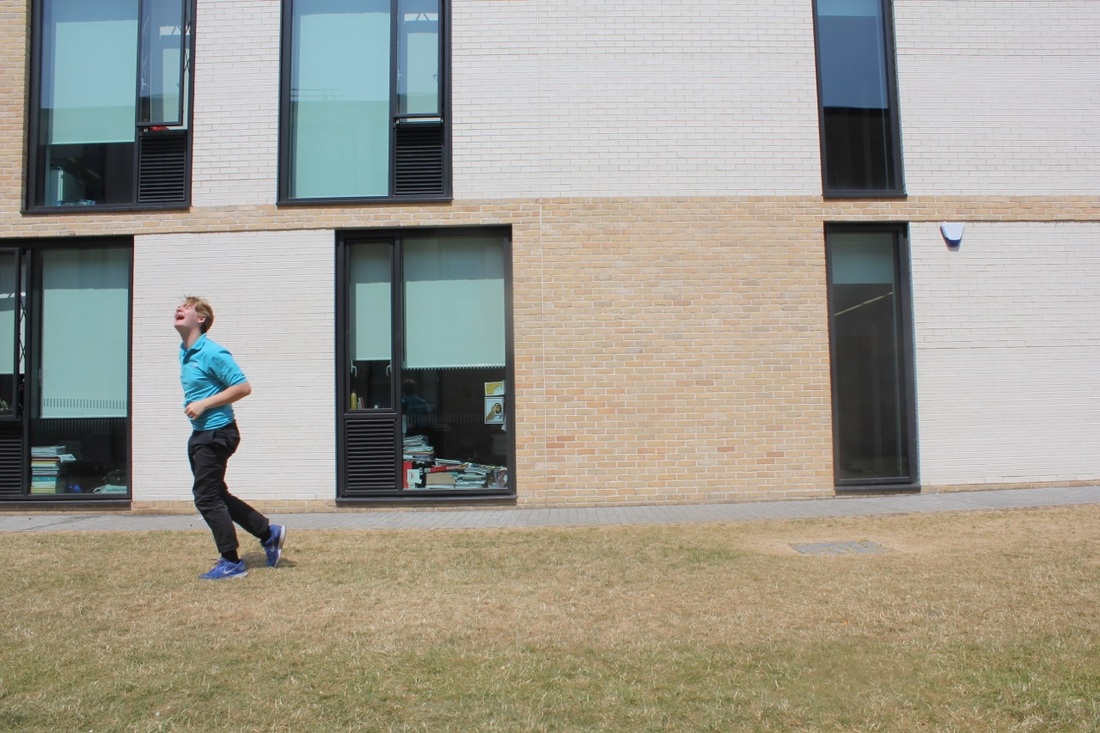
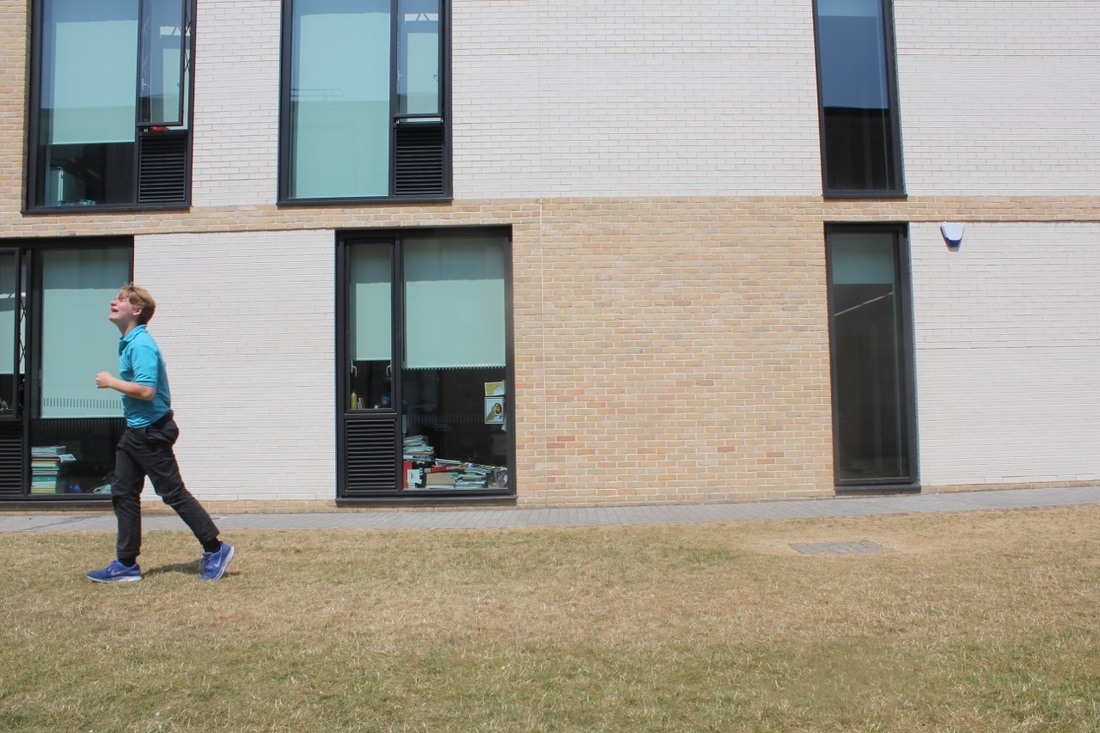

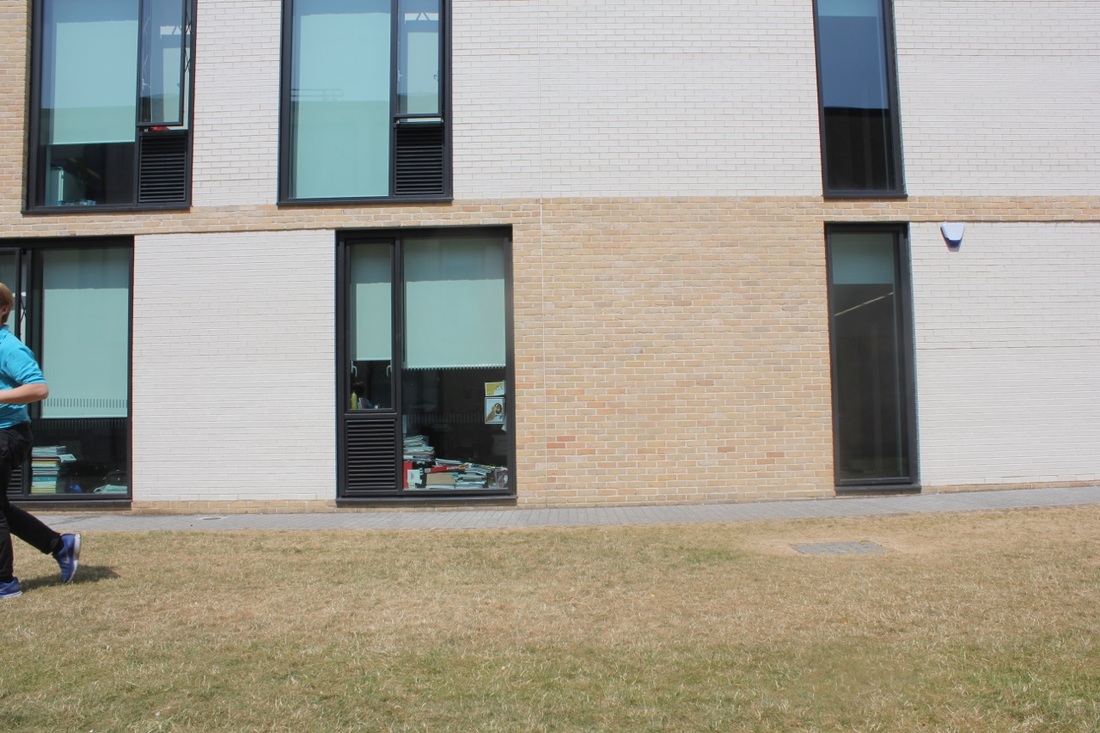
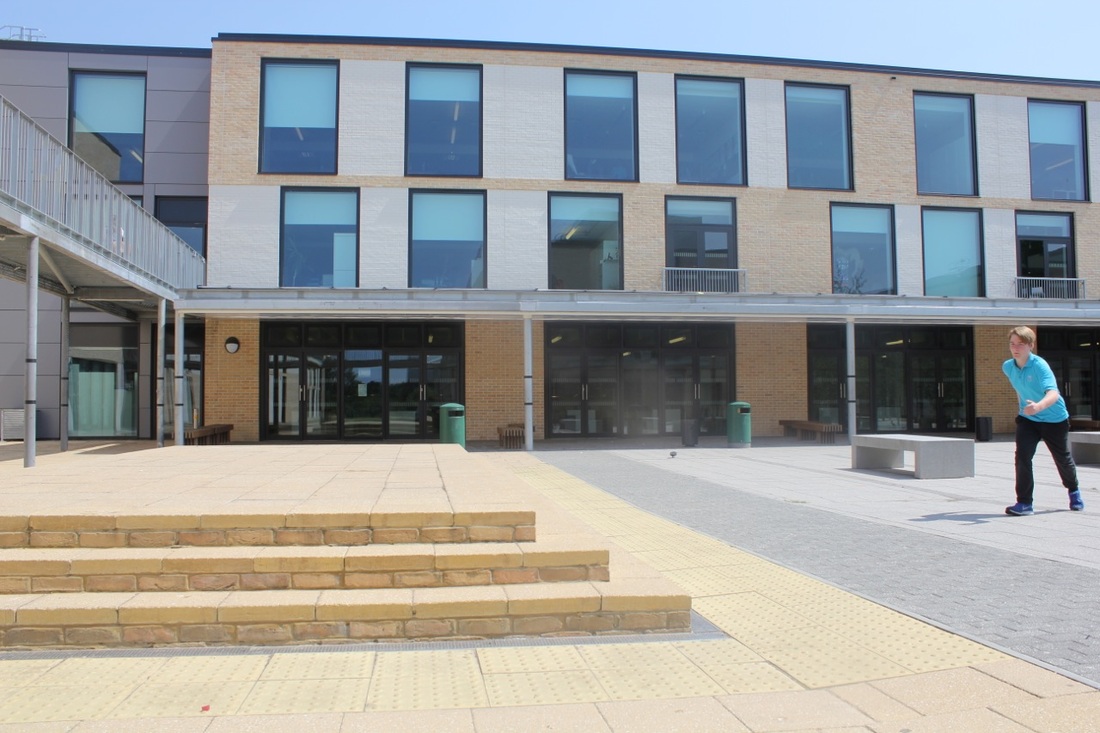
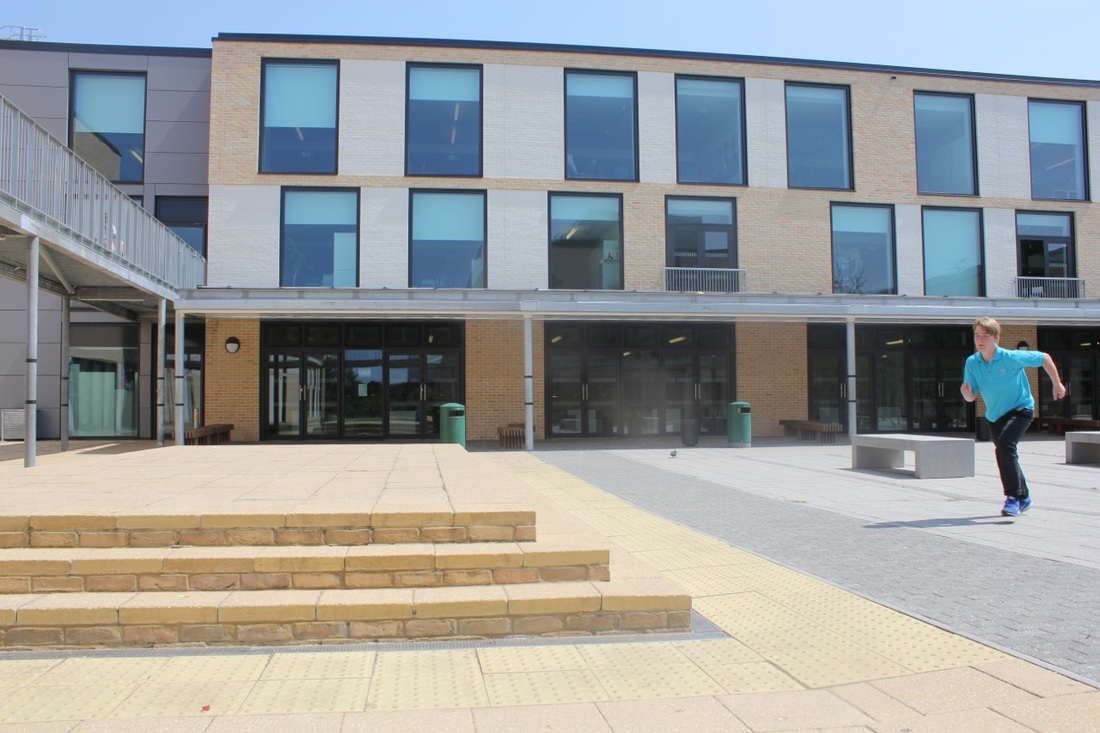
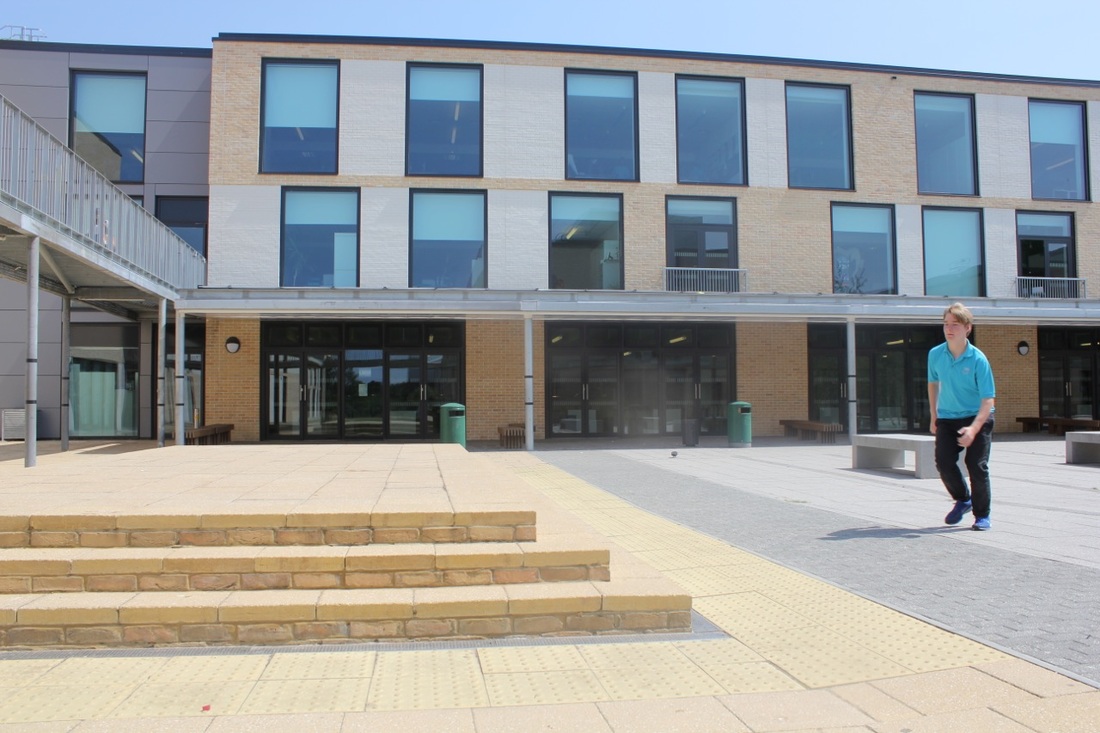
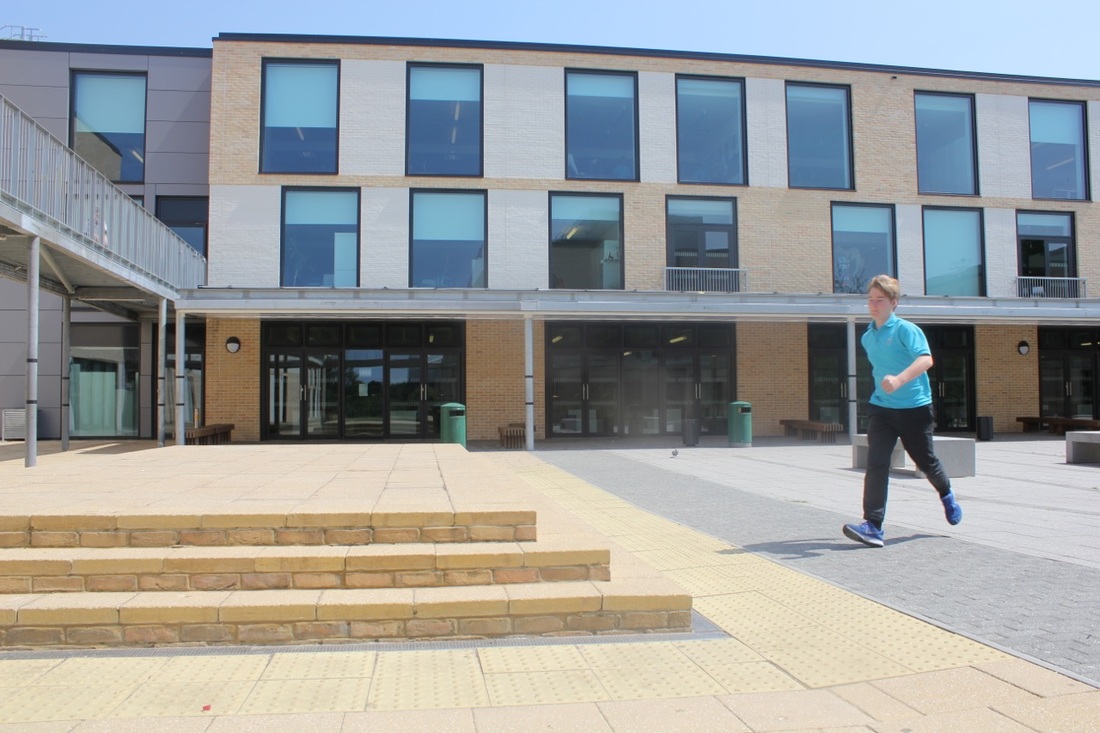
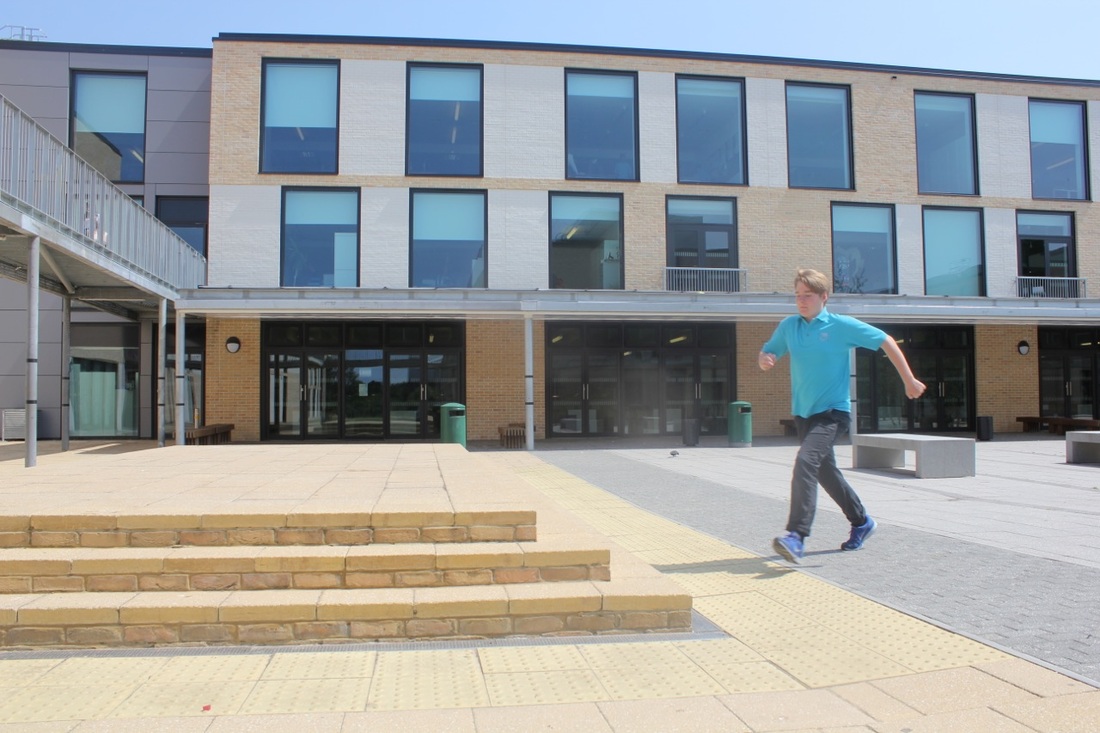
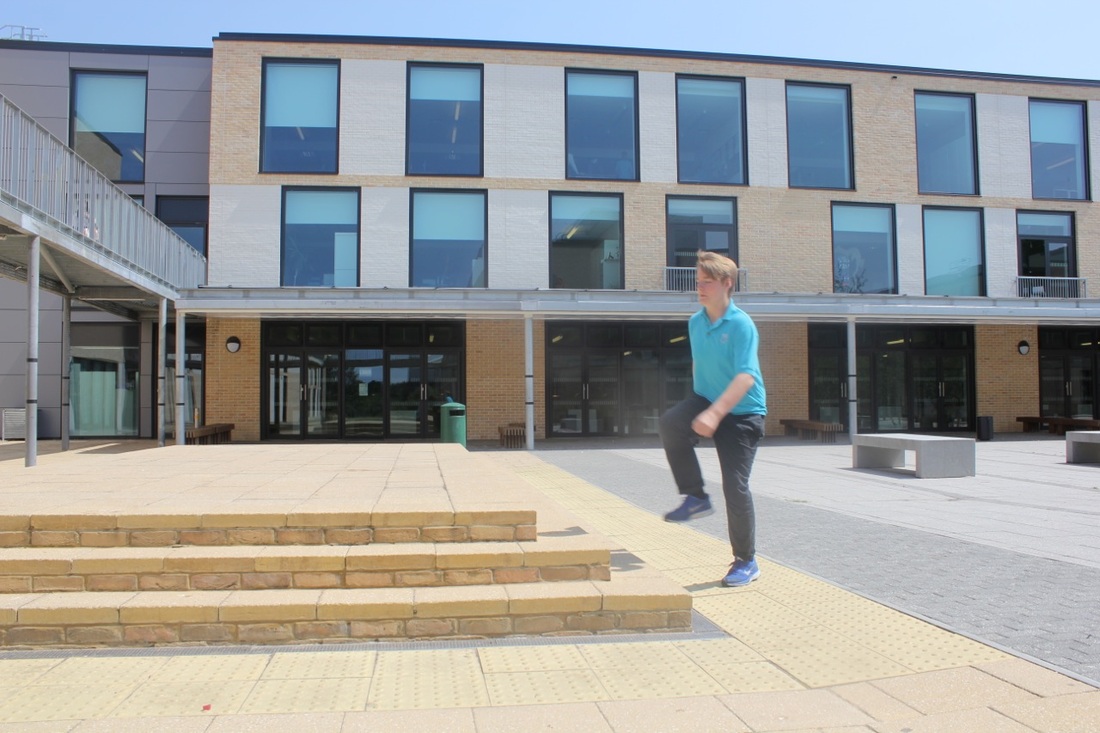
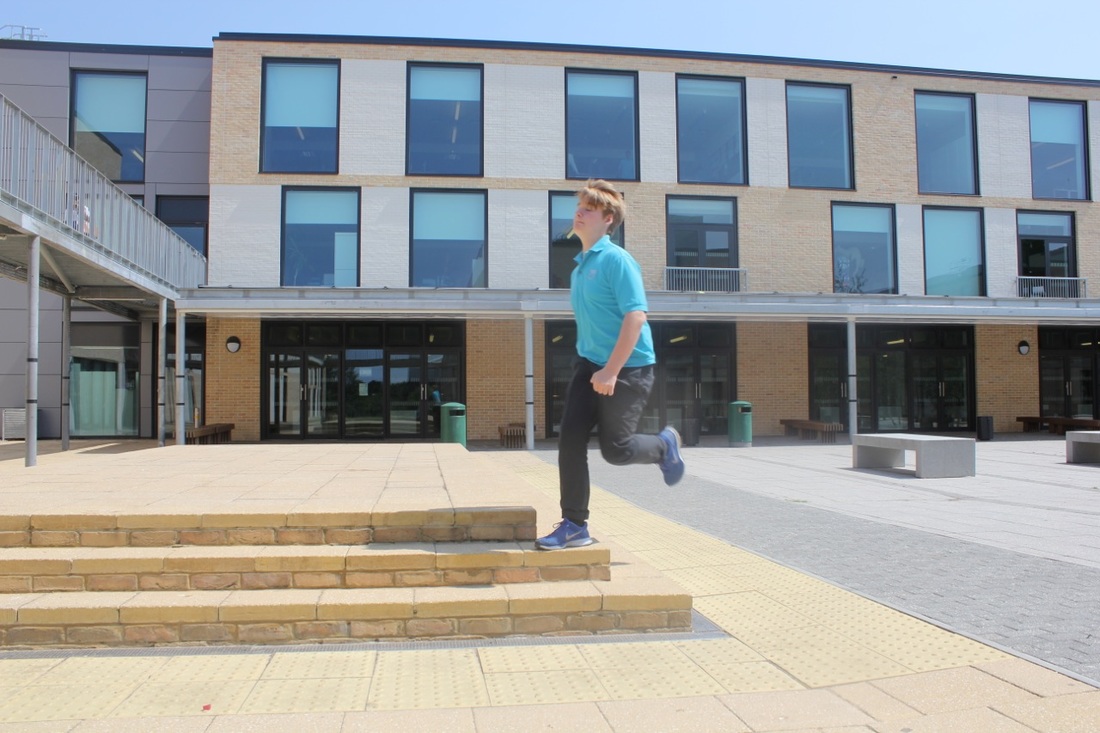
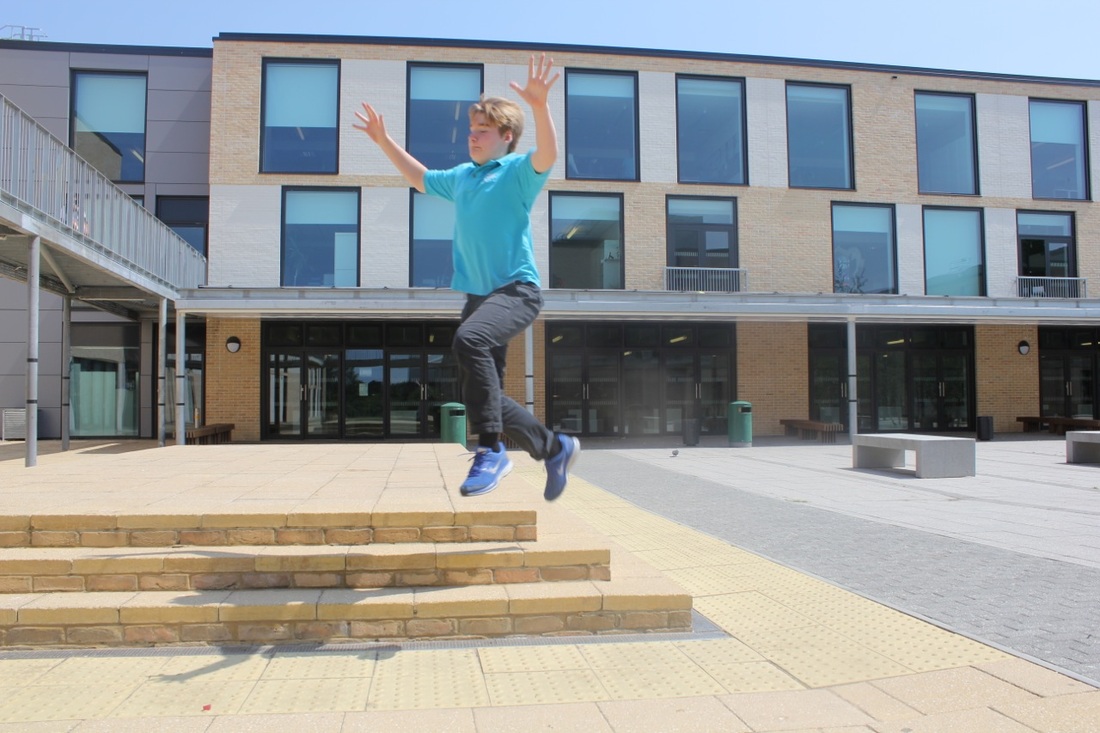
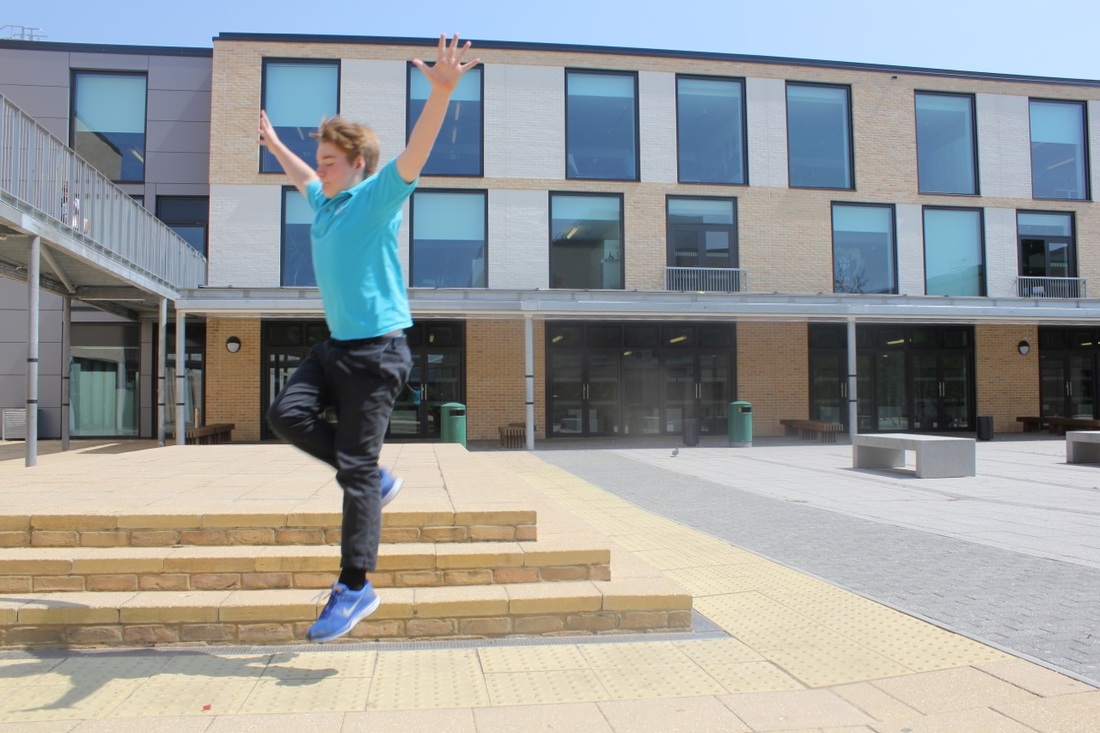

I tried three different sequences. I chose the last sequence to work with because I liked the way the figure got larger as it came closer to the camera. I thought this would make an interesting final image.
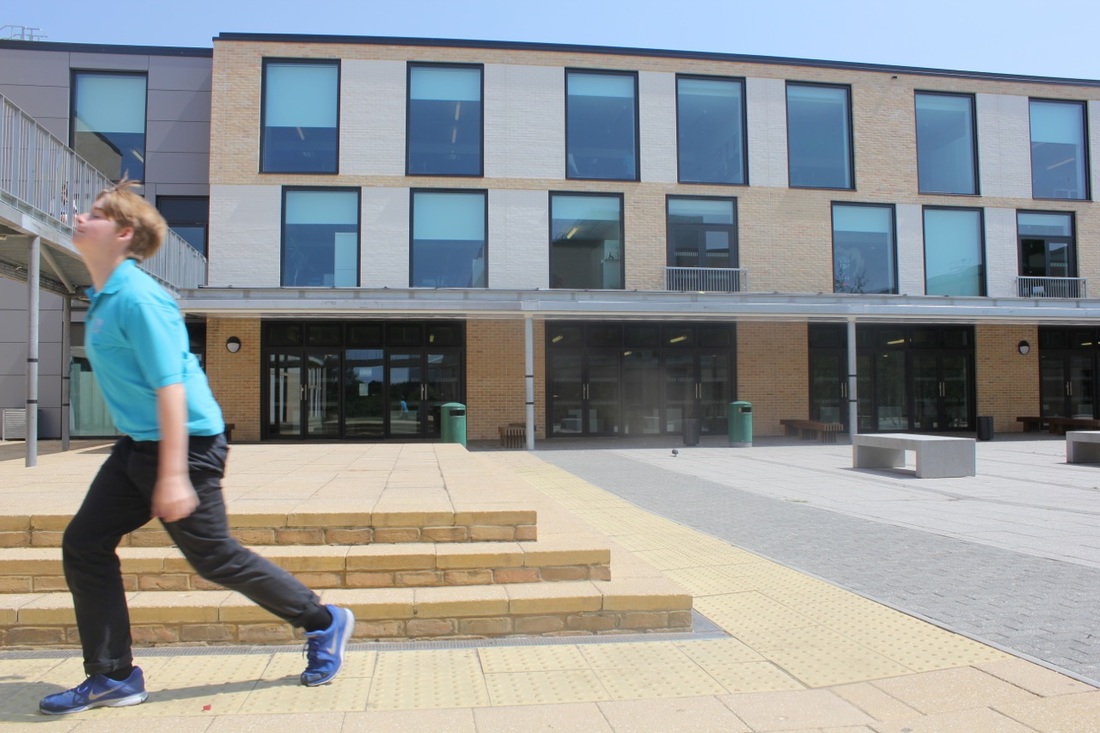
My final piece uses the burst fire function of the Canon EOS 550D DSLR camera. I had my friend Shay model for this shoot, and he ran and jumped off of a step, creating the movement I needed to give the image some interesting features. As the image was, at first, in about 17 different frames, I needed to stitch them together using Photoshop.
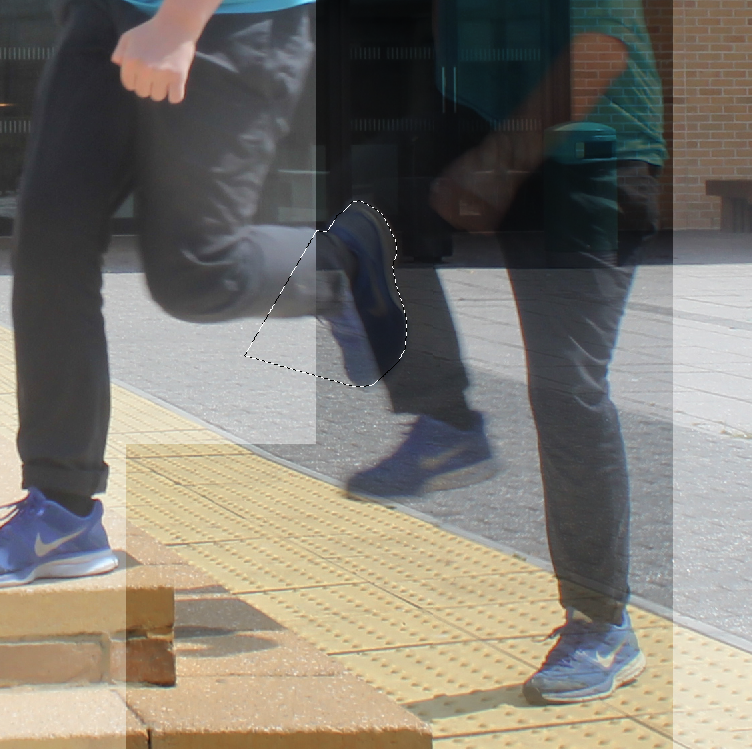
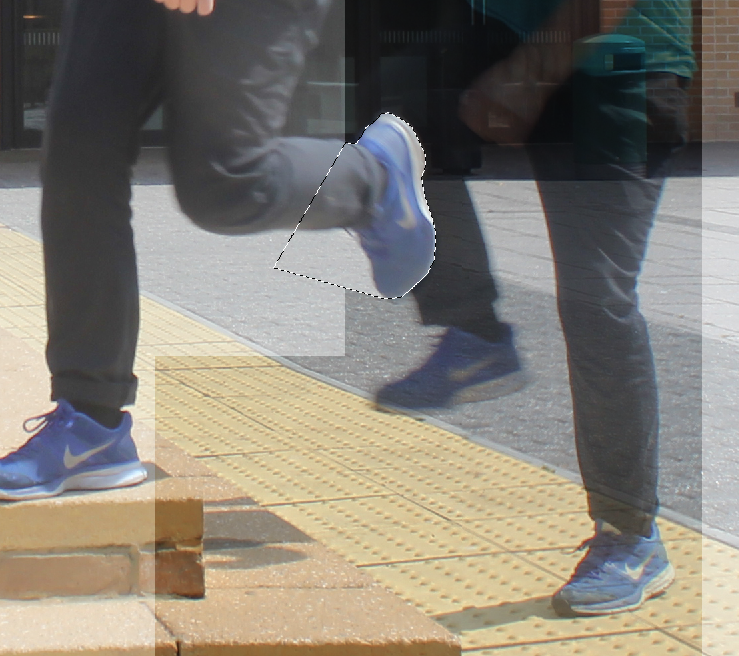
Photoshop
It took a while to get used to Photoshop with all of its tools and menus. I had to practice a lot to get the hang of creating the different layers and knowing which bits of each image to cut away to reveal the layer beneath. It was especially difficult where there were overlaps (see below). I used the Rectangular Marquee Tool to select and delete big sections of each image and the other Lasso Tools to trace around the overlapping shapes before cutting the right shaped hole. I had to be careful also with the shadows, making sure I didn't cut them out (see image 1 below). Zooming into the image really helped to make accurate selections.
Version #1
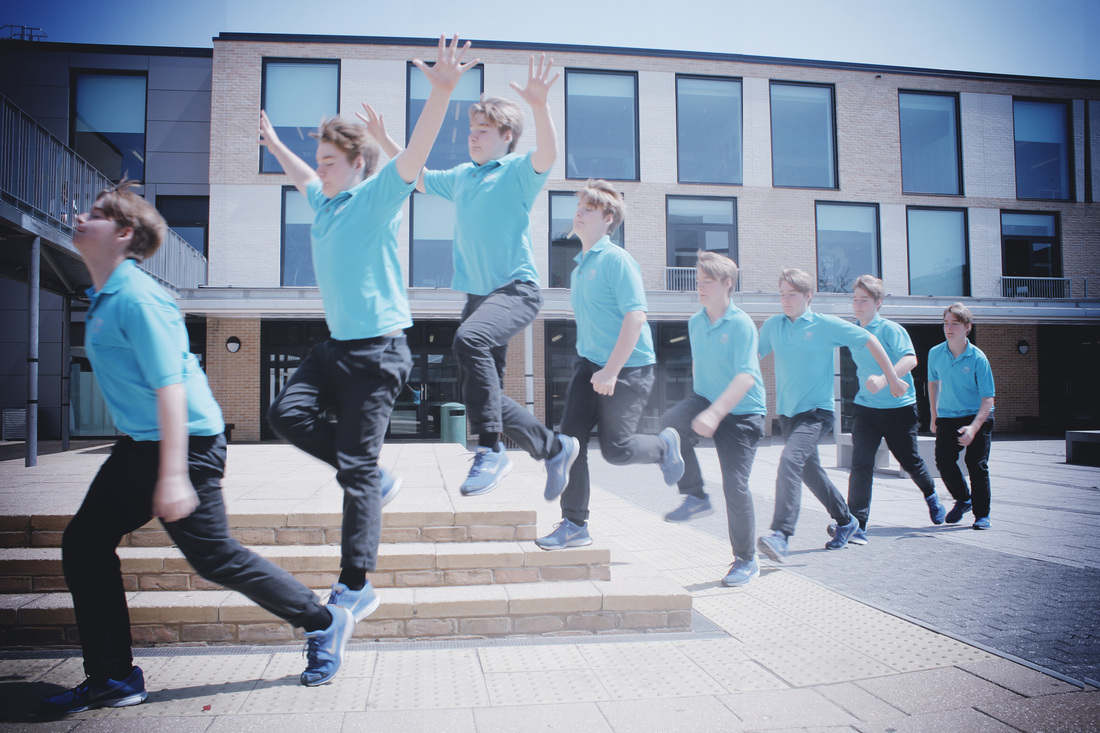
Version #2
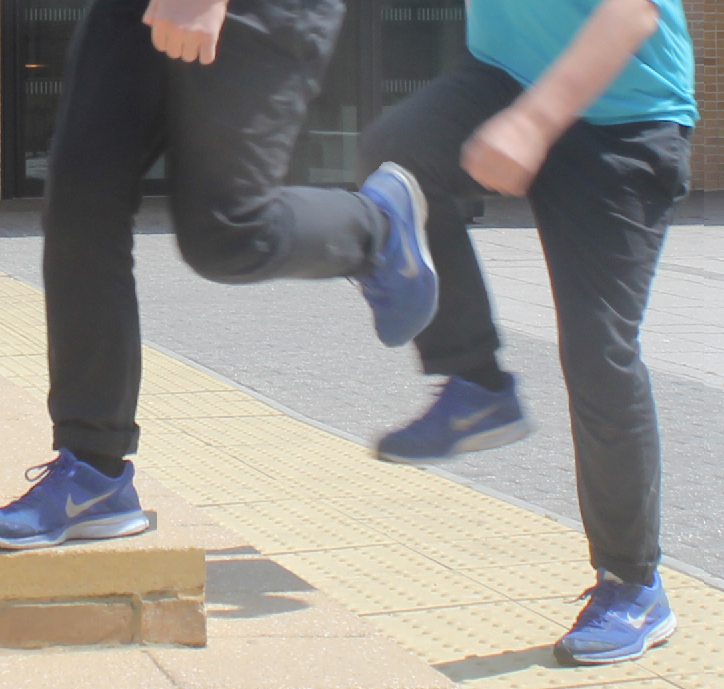
I used an image editing programme called CameraBag to apply a vignette to the image and make the colours cooler (more blue). I think this makes the final picture more believable.
The Final Print
I thought the final image would look good bigger so I used Photoshop to split the picture in half (using the Guides) to create two A3 images. I have stuck these together and mounted them on board to display in the exhibition. I am really pleased with the end result.